Cabinet build "How To"...Galaga mini example
I have had a few people ask me about how I assemble a cabinet. The example below is a Galaga mini (shrunk full sized cabinet).
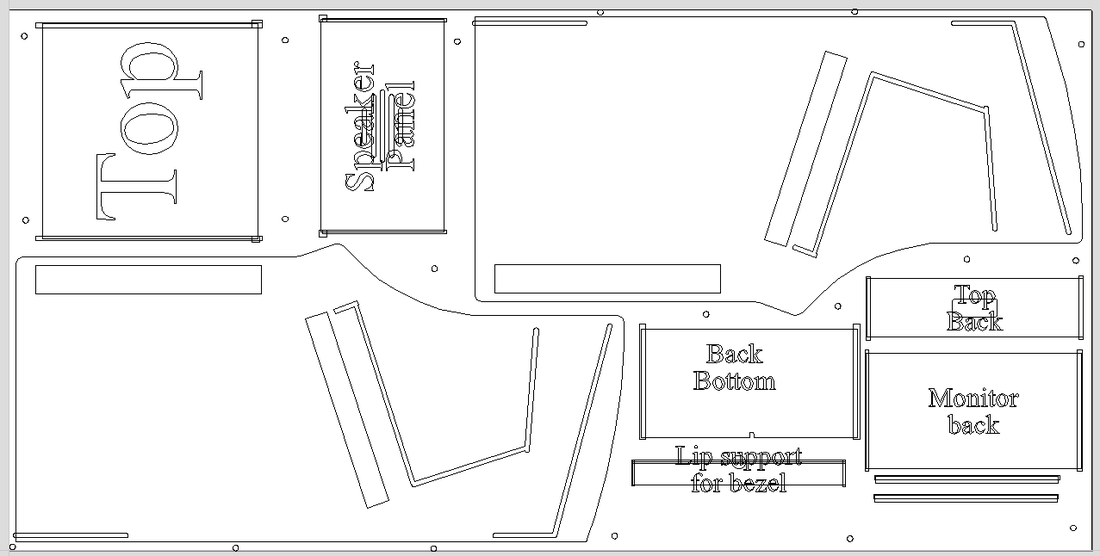
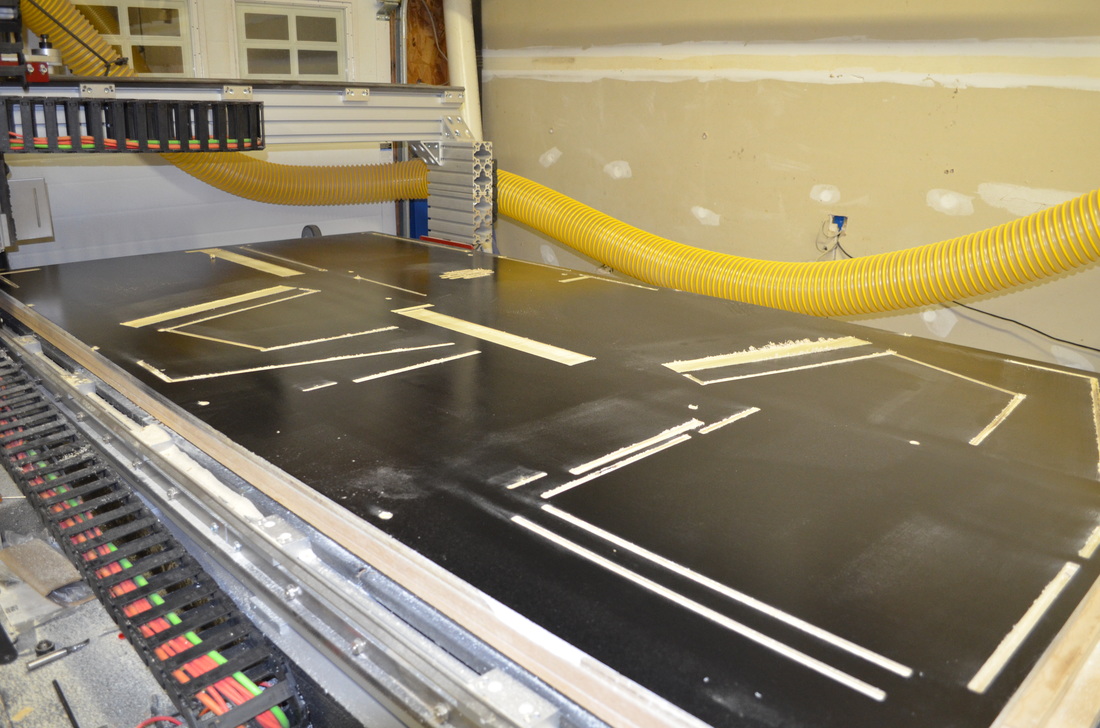
I started out with the full sized drawing from the website for a Galaga cabinet. I then took the drawings and scaled down the drawing by 20%. I then went back and re-sized all of the mortise and tenon joints so everything would still fit together. These joints are based on the thickness of the material being cut. Bellow is the "layout" for the CNC machine to cut.
I started out with the full sized drawing from the website for a Galaga cabinet. I then took the drawings and scaled down the drawing by 20%. I then went back and re-sized all of the mortise and tenon joints so everything would still fit together. These joints are based on the thickness of the material being cut. Bellow is the "layout" for the CNC machine to cut.
Since this is a cabinet for my daughter and not for trade, I have been doing some experimentation with wood finishing. Most of the cabinets I cut, I like to paint or apply laminate to the wood prior to cutting. It is much easier to paint a single sheet as opposed to an assembled cabinet.
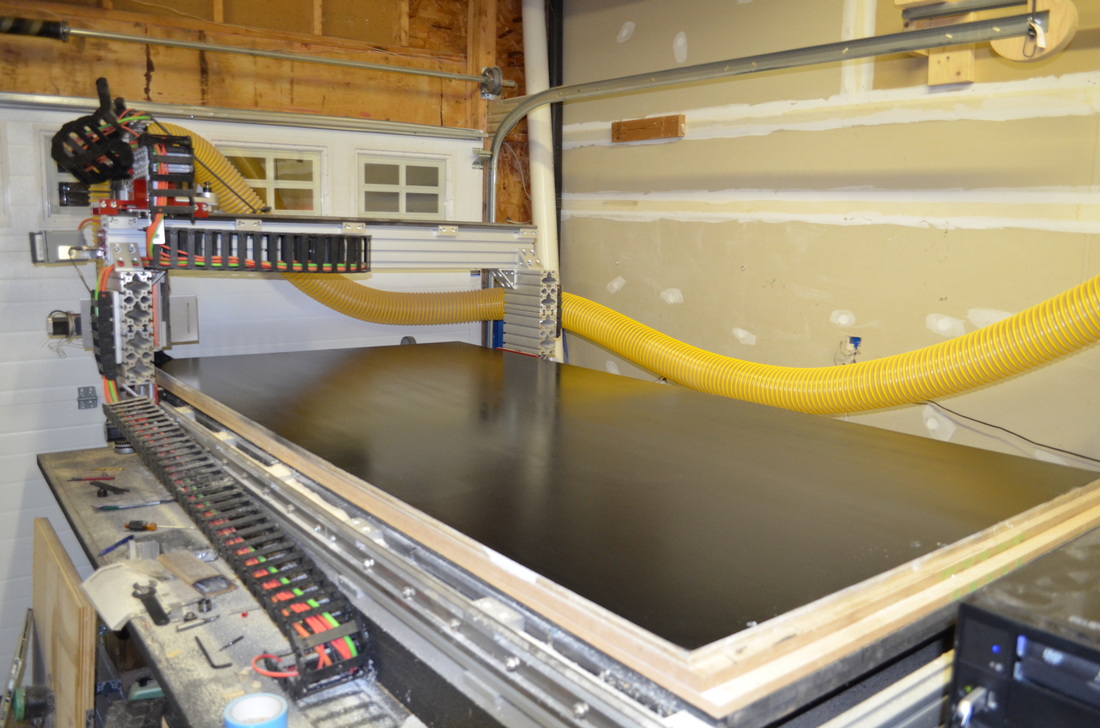
The piece below is a 3/4" piece of furniture grade plywood (low quality from a big box store). It was finished as follows;
1. The first step was to apply an extremely thin layer of drywall mud. This was used only to fill the wood grain. A quick sanding with 80 grit sandpaper and wiped down.
2. Next, a rolled a layer of Kiltz Sealer (oil based) was applied with a heavy nap roller. The sealer was then sanded with an orbital sander and 120 grit paper and wiped down.
3. Next, I sprayed a layer of Rust-Oleum Black Satin thinned with Naphtha using a HVLP gun. The paint was sanded quickly with an orbital sander with 220 grit paper and wiped down.
4. Finally, a second coat of Rust-Oleum Black Satin thinned with Naphtha was sprayed on. I then Hand sand with 800 grit. Wiped over (quickly) the paint with a rag containing lacquer thinner.
If the panels were to be externally facing, I would probably do a third and final coat. In my case, the black is primarily on the inside panels, top, and back.
NOTE: I am not a painter. I am still learning... and I am looking for a cheaper alternative to automotive paints (which turns out great while looking fake). I am open to any suggestions to the above process.
With everything long dry, I place the panel on the CNC table and tack down the edges with screws. Since I unfortunately do not have a vacuum hold down system, I have to either tape (double sided duct tape), clamp, or screw down my work product.
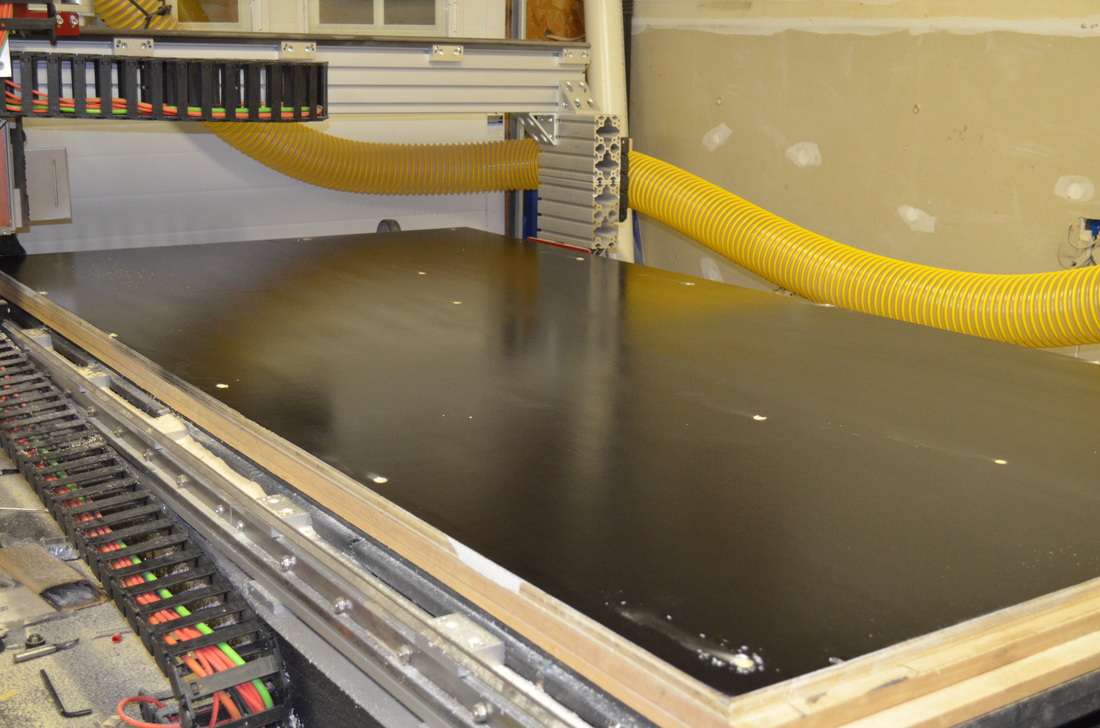
Next, I had the machine go and mark my hold down locations for me. I then screw down the piece of wood I am cutting into the spoil board. I draw out these locations on the CNC drawing and I have the table cut / mark these locations for me.
Most of the time, I am not that concerned about having lots of hold downs, but the Galaga cabinet has a lot of mortise and tenon joints, an my piece of plywood isn't totally flat (probably from initial purchase at the big box store and possibly how I was storing it after painting). If the sheet I am cutting isn't flat, the joints will be of varying thicknesses and will not fit together. As a result, I need to make sure the piece I am cutting is totally flush to the spoil board.
I CAD out the locations of my hold downs to make sure they don't interfere with any of the pieces I am cutting. It also helps to same my cutter from accidentally cutting a screw off and damaging the cutter.
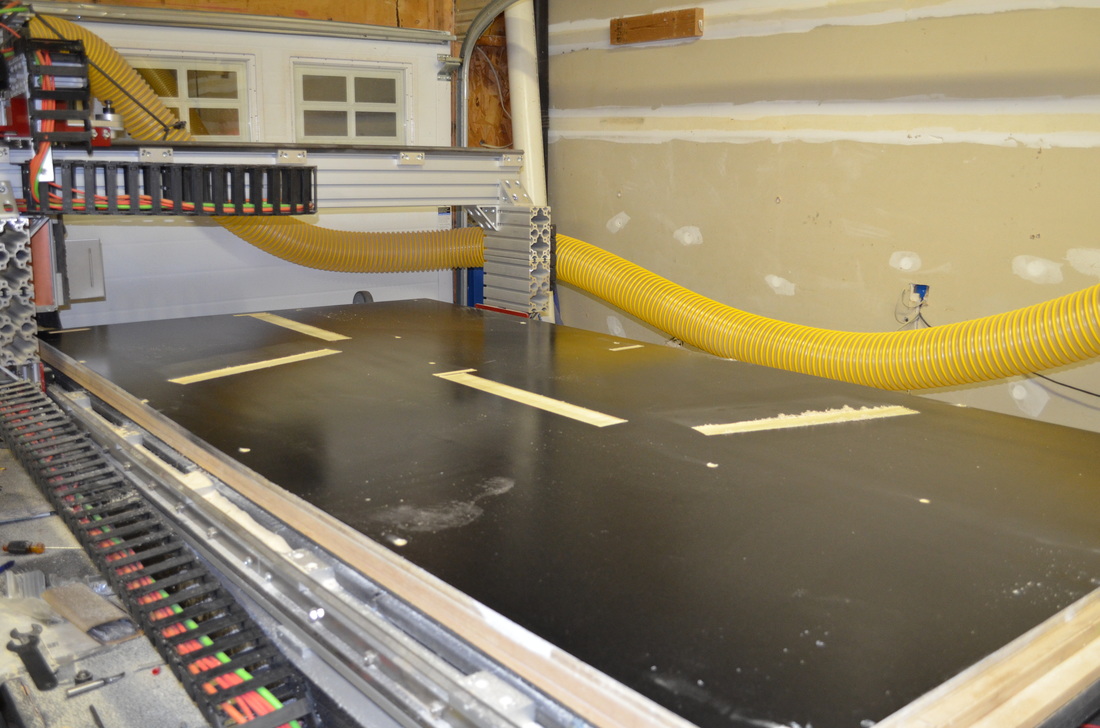
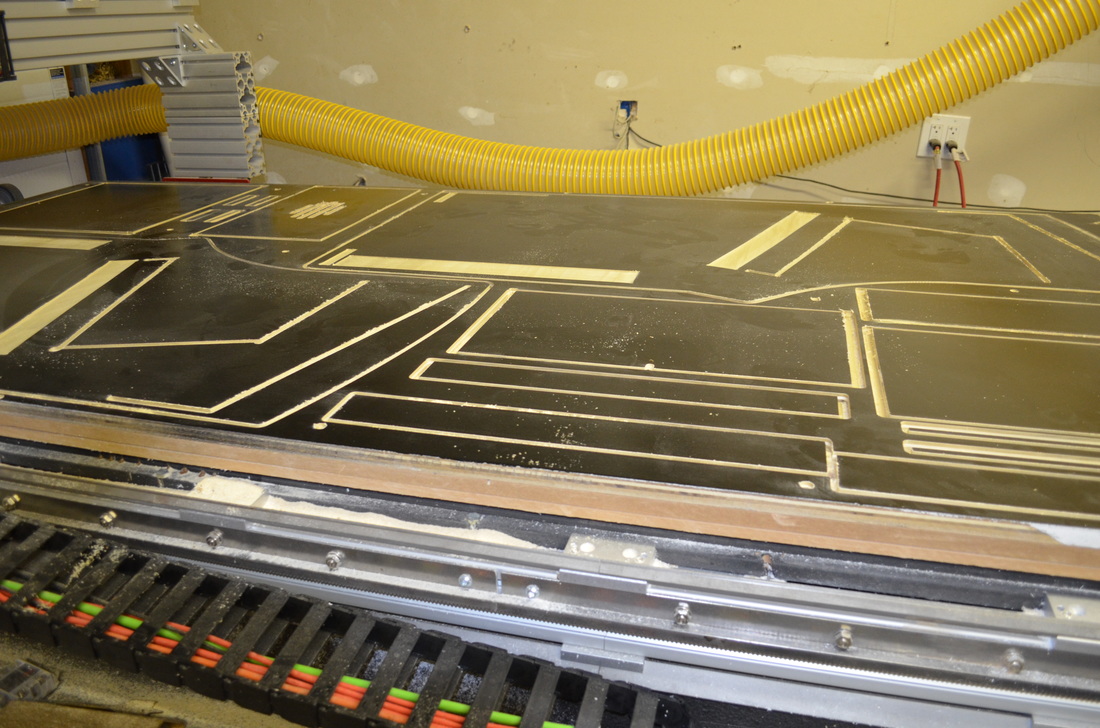
Next, I cut the shallow (0.10") cuts that I am going to use for blocking placement (Bottom left). I usually like to cut these first because it will allow me to gauge how "flat" the piece of material is that I am cutting. In this case, I am cutting using a Whiteside 1/4" compression bit for all of my cuts. I love these bits and they do an excellent job on plywood provided your cut is at least .25" deep. The 1/2" Whiteside compression bit is also excellent. It produces a lot more dust per pass, but it runs much quieter and can take bigger cuts per pass. The 1/2" bit needs to have a deeper cut then the 1/4" bit to have the compression design work correctly.
For the first cut, the whiteside 1/4" bit is a horribly bit for this cut because it cuts the wood "up" and results in a layer of "fuz" when cutting across the grain of the top layer of plywood (too shallow a cut for the bit). I will have to run down the edge with a layer of sand paper to clean it when done. I find it is easier to clean up the edge with sand paper then to change the bit.
With the verification that the plywood is flat enough to cut, I cut the mortise an tenon joints next. These joints are extremely sensitive to material thickness and depth of cut. If you are cutting with plywood, please verify the thickness of your stock with a micrometer. Plywood thickness can vary, and depending on the quality of the wood, this variation can occur within the same sheet.
Now is also time to cut out any inside "areas to remove". Such areas would be the insides of the speaker grill or the coin door (appearing on sheet two). We want to cut out all of these special areas prior to cutting out the panels. In the example of the speaker panel, if we cutout the panel first, and the grill second, there is a chance that the panel might shift and result in a bad cut to the grill.
|
|
Next is to cut out all of the panels. I usually turn off dust collection of the material to be cut isn't held down with double sided duct tape (like this one since it is screwed down). The reason for turning off dust collection is that the compression bit will force the sawdust towards the center of the cut. This is done because the bit is performing an upward cut from the bottom of the bit and a downward cut from the top of the bit. These directions then "compress" the saw dust towards the middle of the cutting surface packing it in place. By compressing the saw dust, it basically locks in the panels from moving.
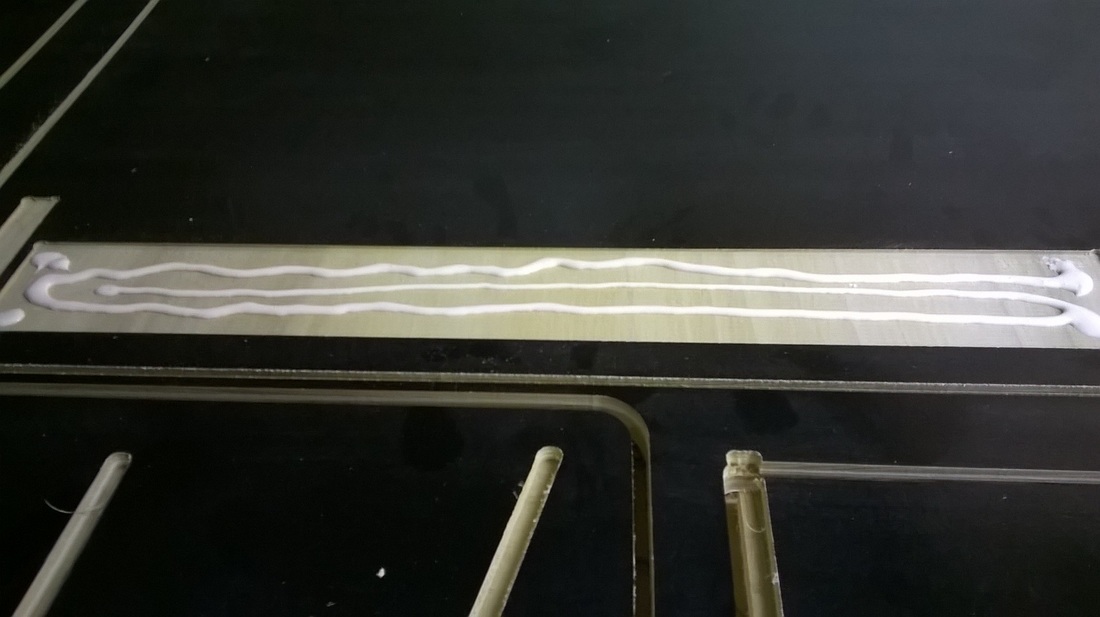
I now remove the blocking I cut out and sand the edges. In most cases, I will simply glue the blocking down and let it dry overnight. This case is a little different as I will be applying art to the front of the cabinet. I would like the from panel to be easily removable so I can apply and trim the side art.
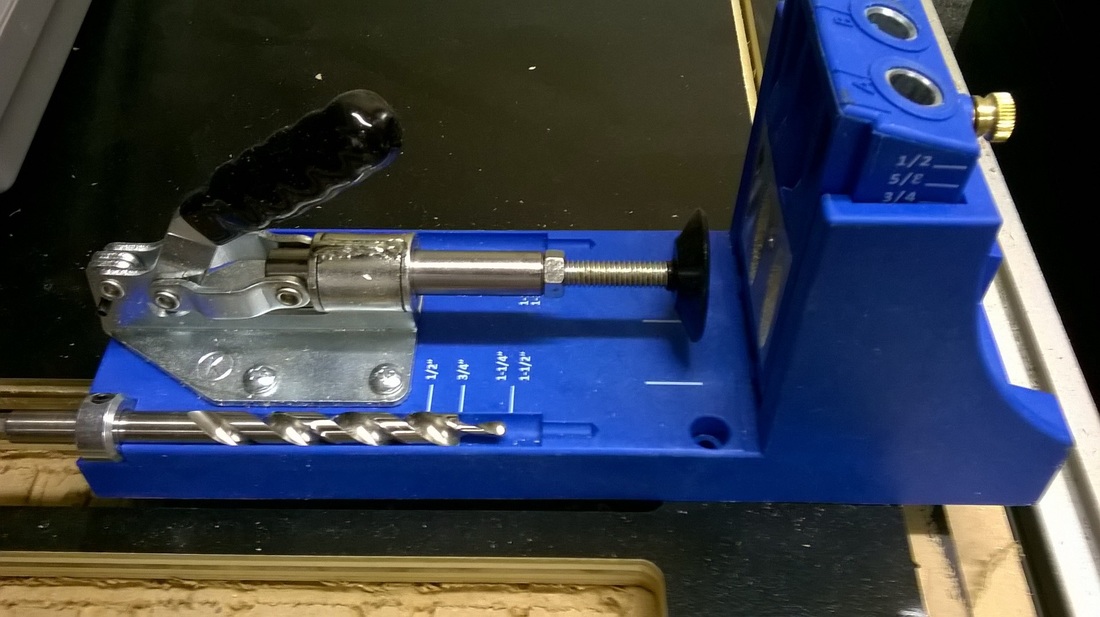
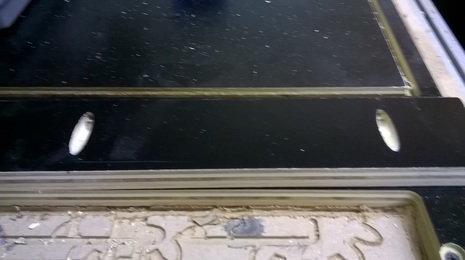
Before I glue the blocking down, I will be cutting holes for the use of Kreg Jig / Screws to hold the front panel on. When using the jig, you set it based upon material thickness. In this case, I am using 3/4 material... but due to my 0.10" offset, I will be drilling these closer to 1/2".
Before I glue the blocking down, I will be cutting holes for the use of Kreg Jig / Screws to hold the front panel on. When using the jig, you set it based upon material thickness. In this case, I am using 3/4 material... but due to my 0.10" offset, I will be drilling these closer to 1/2".
|
Most of the time when I list a tool that I am using, it is for reference so someone can find a similar tool.
The Kreg jig (pictured to the right) is one of those items I wish I had been told about years ago. It is extremely over priced for what it is.... but it works beautifully. The jig allows for the easy cutting of screw holes and guides that line up joints beautifully. When tightened, the joint come out nearly perfect at 90 degrees. It is particularly useful when you are trying to dry fit a cabinet together so it can be easily disassembled before glue. Additionally, the screw joints are so strong that glue or nailing really isn't necessary. While I think it is EXTREMELY overpriced, I love the jig. |
|
|
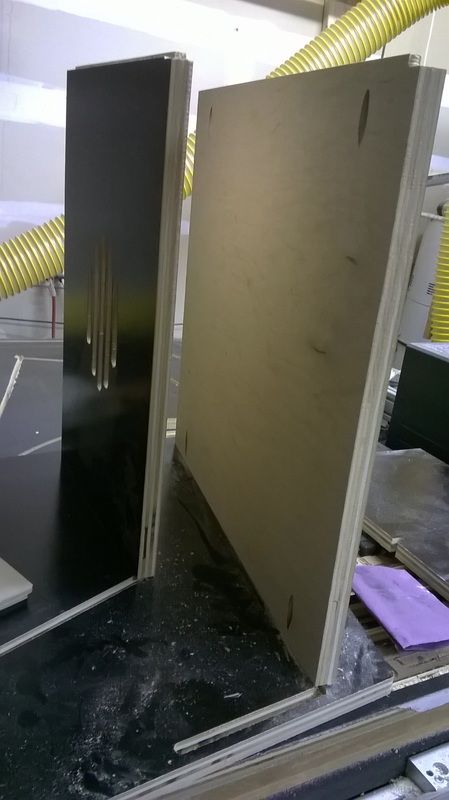
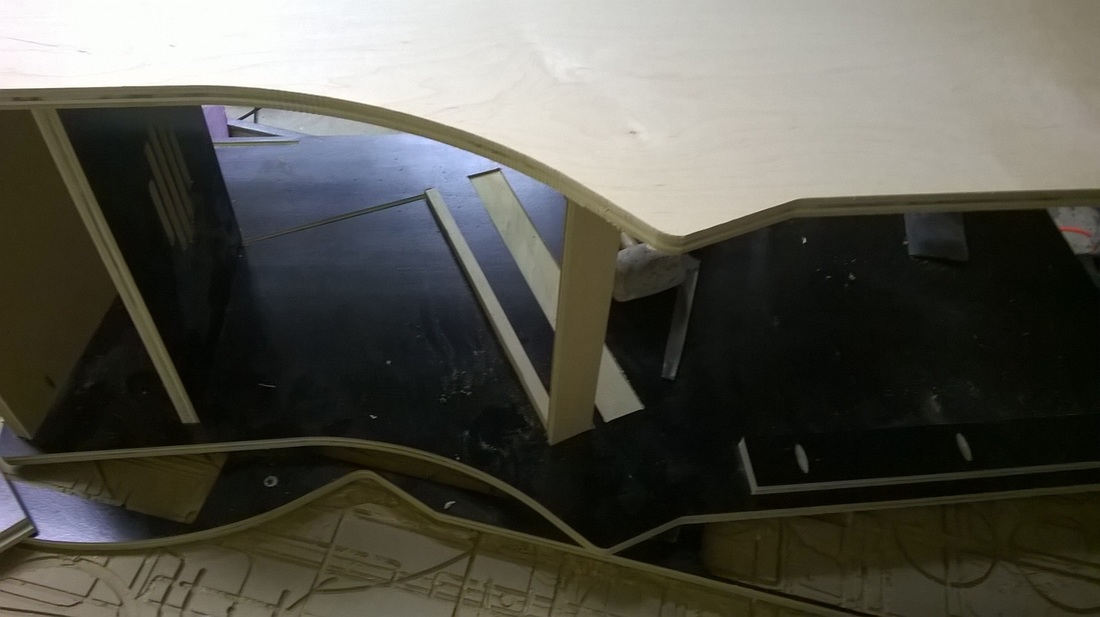
The blocking for the Galaga mini isn't standard, and this was done intentionally. The pictures to the left are of the blocking for the front panel / coin door. The blocking was designed to allow for the easy assembly and removal of the front panel. By allowing the front panel to be removed, it makes it easier to apply the art to the panel and trim the edges.
First, I cut my screw guides into the blocking. This will allow the front panel to be held on only with screws. The blocking is then dry fit into my .1" recessed cut made into the side panel of the cabinet. Traditionally I shrink my blocking (in all axis) by .05" and this allows for a nice and snug fit that doesn't need a rubber mallet for assembly. If the fit is tooooo tight, some 60 grit sand paper will quickly fix this problem. Once dry fit, some glue is added and the blocking is put in place overnight to dry. This is repeated for all of the blocking of the cabinet. |
|

|
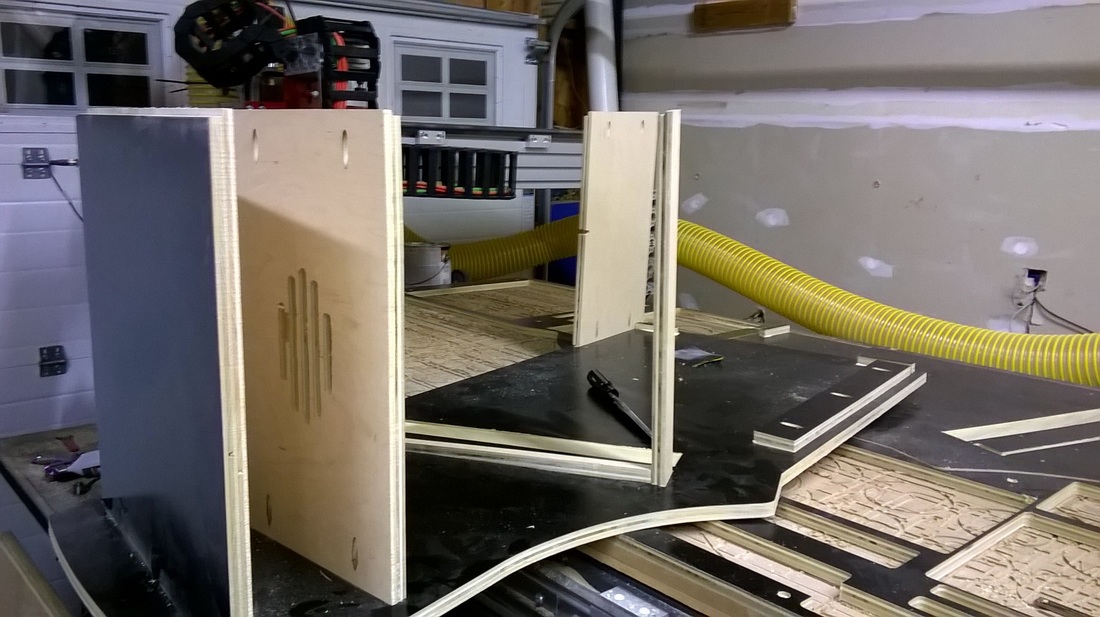
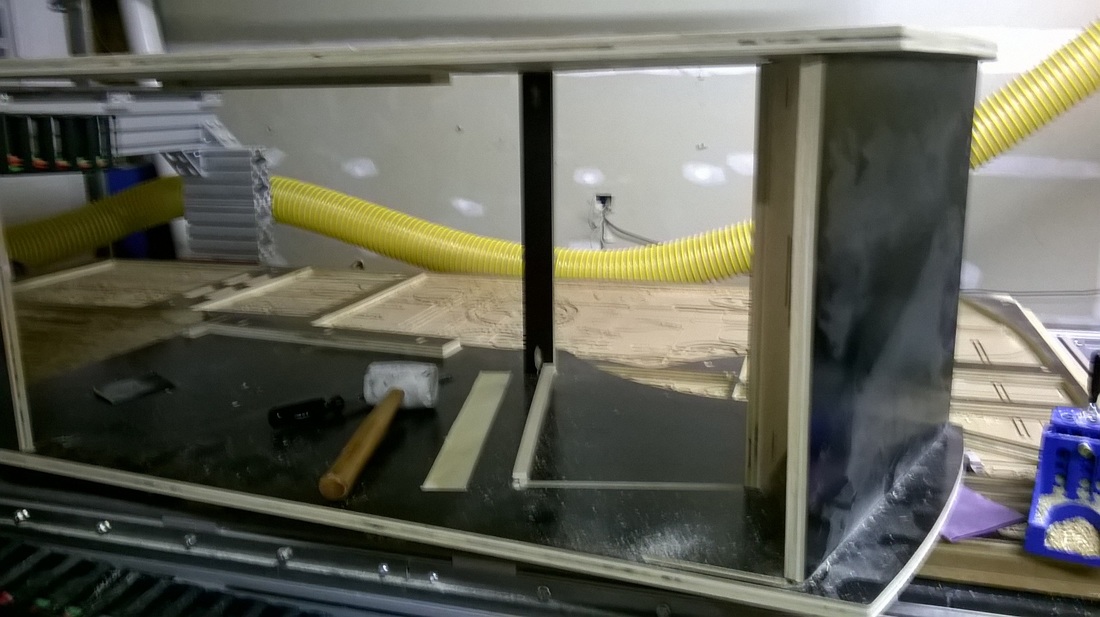
From here, the cabinet continues to be assembled with screws (no glue) to make sure all of the components fit. The combination of nice squarely cut edges from the router and the Kreg screws, and some minimal clamping when screwing, everything goes together at nearly perfectly at 90 degree angles. If everything is clamped correctly and screwed correctly, the holes can all be re-used once all of the part are confirmed as fitting correctly (or just left alone and not glued as well). Any slight variation can be corrected with better clamping and measuring.... or if you are lazy....leg levelers.
|
|
last updated 11/23/2015
|
|
Special thanks to the contribution by: Chris for the Pac-Man cocktail plans
All graphics/images/cabinet designs on this site are copyrighted by the their original owners. ClassicArcadeCabinets.com makes no claim to said such rights and provides the cabinet designs for collectors and hobbyist of the original arcade coin-op machines. Images and graphics are for reference only. Any copyright holder wanting their images or reproductions removed from this site should contact us and we will immediately remove these images.
SITE LAST UPDATED January 16, 2024
|

|