|
Arcade - Arcade Cabinets - Midway Games - Mortal Kombat 3
Mortal Kombat 3
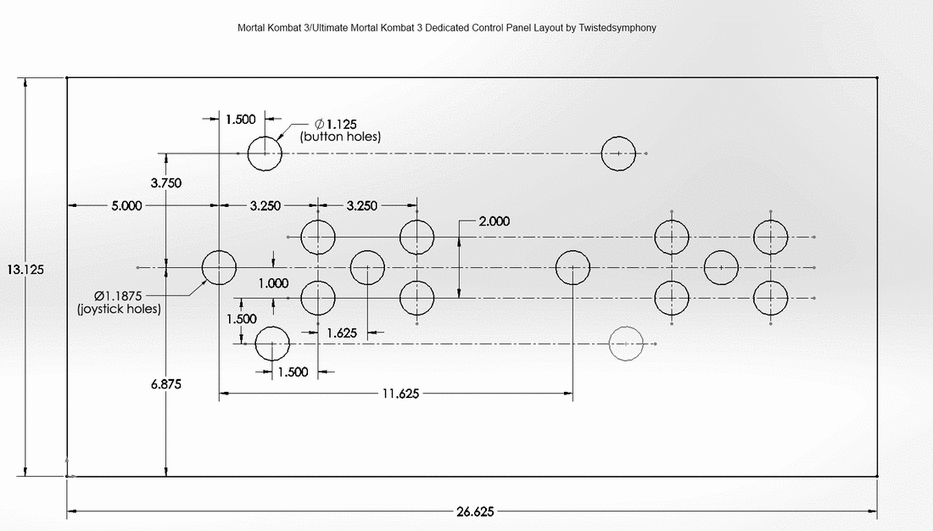
Misc. Information Cabinet measurements provided by: [email protected] Control panel button placement / drilling pattern provided by twistedsymphony. Drawings and printable plans provided by iN33DCaTNip Has a cabinet been cut from drawings: Yes Construction type: 3/4" MDF all components unless identified below. 3/4" Plywood : base, extenders for front panel, cross braces, front panel, back base 1"x1" 2x 30" skids for bottom of cabinet 1x 22" skid for front of cabinet 1x22" front panel support for bolting control panel 2x6" blocking for control panel to sides of cabinet 1.75" x 1.75" x25.1875 - cross brace / base for monitor glass. See drawings for more details about cuts. NOTE: Please read the FAQ about material selection. Estimate Cabinet Accuracy = 93% What does Cabinet Accuracy mean? NOTE: Ultimate Mortal Kombat 3 shares the same cabinet as Killer Instinct 2. The drill pattern for the buttons is provided in case you do not have access to the metal control panel top. If you have the top, please double check measurements before drilling. |
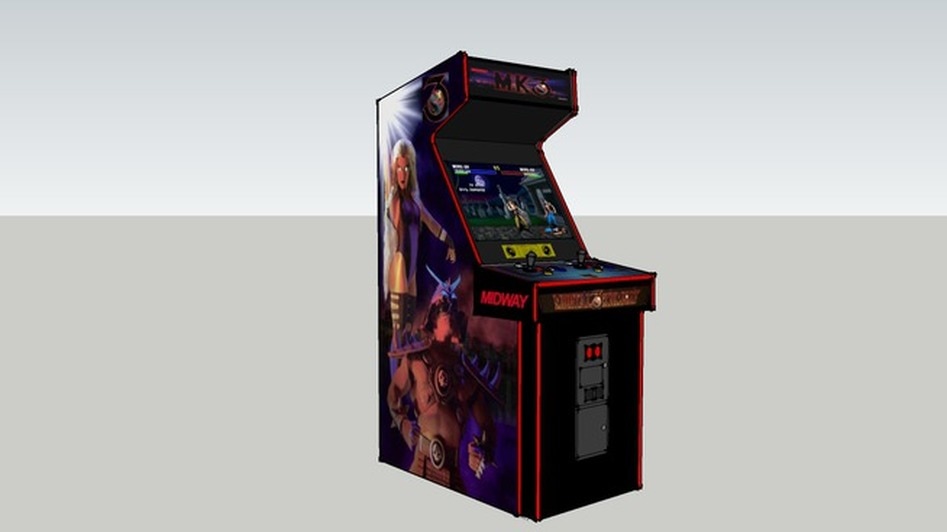
Sketch Up
Dedicated Midway cabinet. Full arts. By Gozer.
https://3dwarehouse.sketchup.com/model.html?id=ae19723c4e96819771d096a6914e7333 NOTE: Sketch Up drawing has the wrong coin door for the Ultimate MK3. |
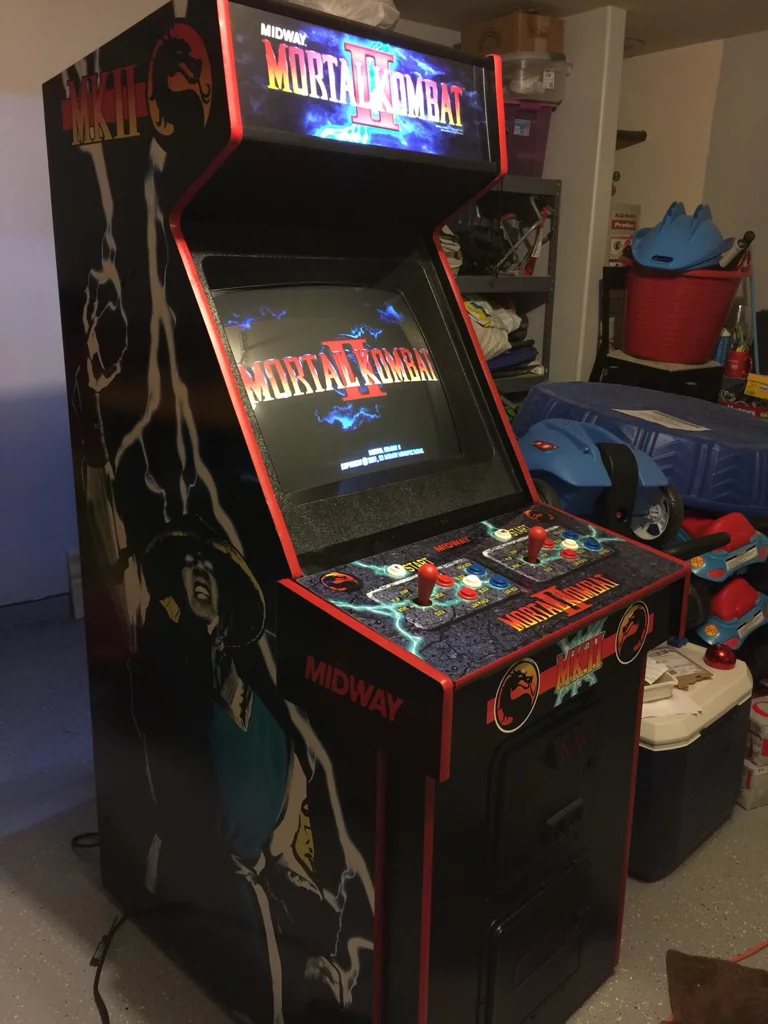
Picture of finished cabinet
Materials used for construction: (not including tools, bits, CNC, etc...)
Picture of build by KLOVer SuperFili
Picture of build by KLOVer SuperFili
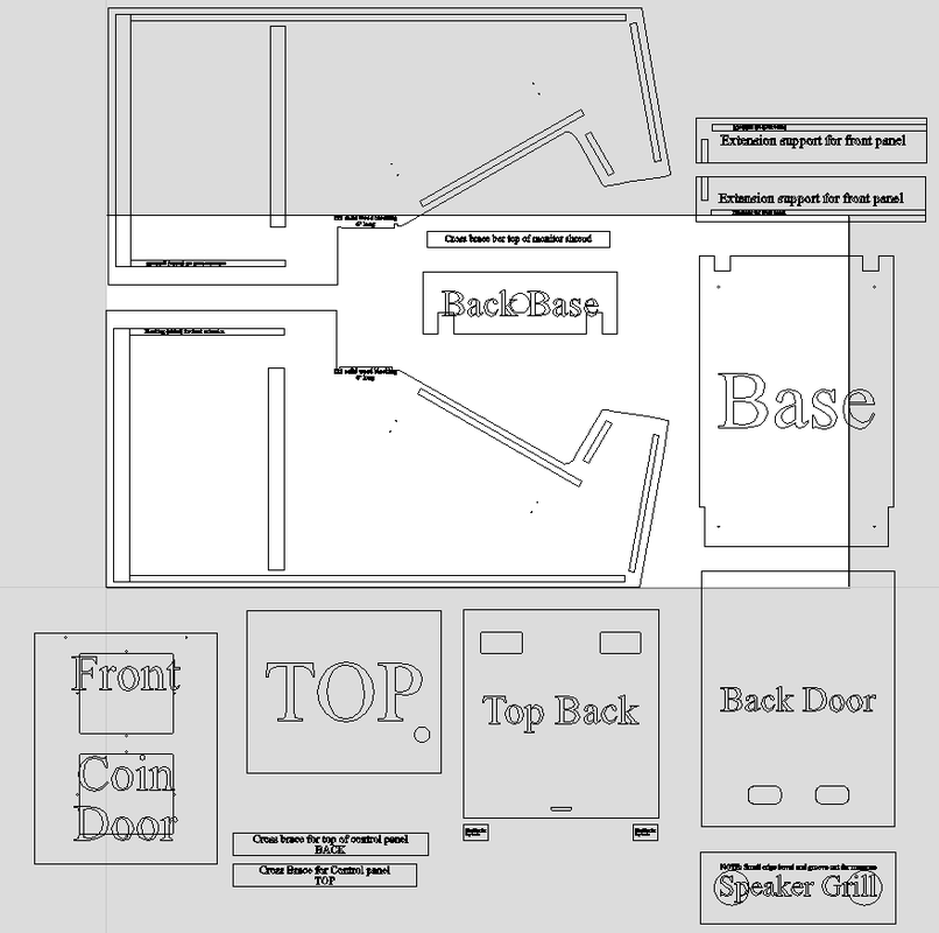
VCarve Pro drawing
Cabinet Drawings
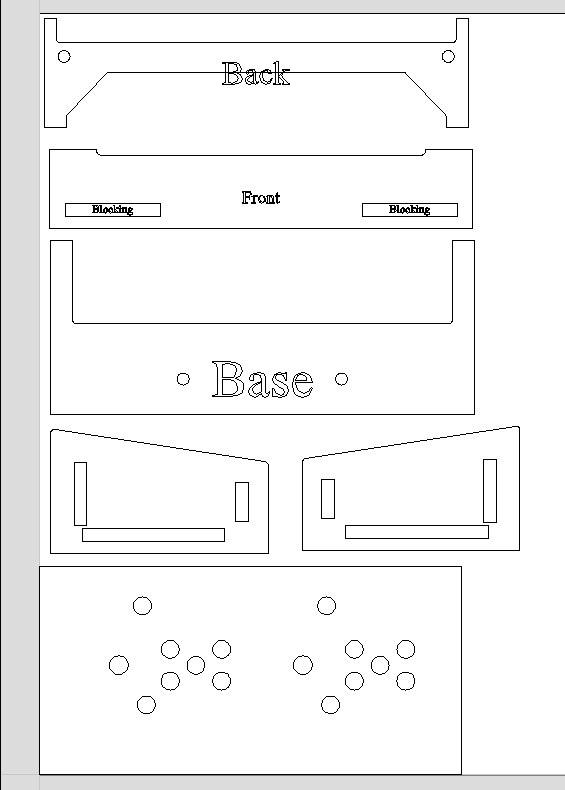
Control panel drawings
VCarve Pro (Verson 8.024) file
Note: .CRV files do not contain tool paths.
|
Cabinet Drawings
|
Control Panel (Blank)
|
|
| ||||||||||||
DXF File (CAD file.)
|
CAD of cabinet drawings
|
CAD of control panel
|
|
| ||||||||||||
Files to print
The below files are PDF documents of the plans that are printed to scale. These documents can be taken to your local print shop and printed on 48" wide media. The prints can then be applied to the wood and used as a template to cut the side panels of the cabinet. I have only included the side panels and any other panels that may be more difficult to cut.
| ki2_printing.pdf | |
| File Size: | 46 kb |
| File Type: | |
| umk3_control_panel.pdf | |
| File Size: | 76 kb |
| File Type: | |
Control panel drilling instructions
Cabinet Art Files
Currently not available
Reference Photos
The purpose of the reference photos are to assist with assembly. They allow for a visual reference on how joints are assembled and edges overlap.
Drawing specific notes
Non-Standard "plywood" in the building plans
As identified in the construction type section above, the Midway cabinet has some wood components that are not standard plywood as part of the construction. These are illustrated below.
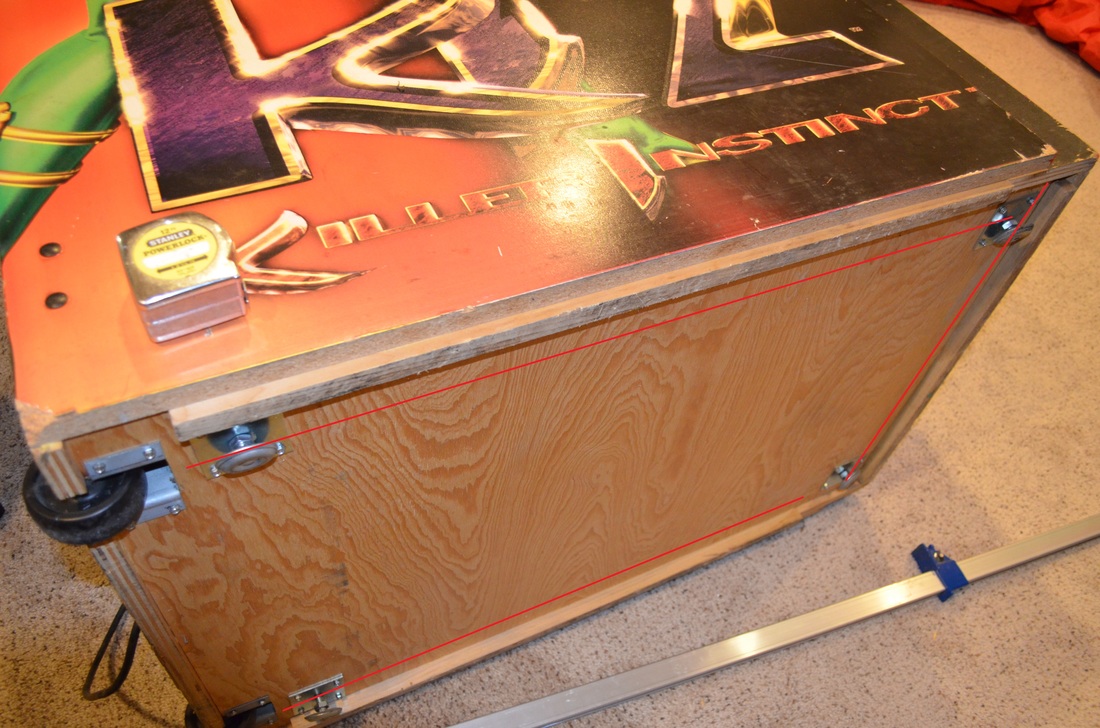
In the picture below, there are 3 solid pine "skids" placed on the bottom of the cabinet to help protect the base. See the 3 red lines below. The 2 pieces that run parallel with the side panel of the cabinet are 30" long and the single front "skid" is 22" long. All of these pieces have measured edges of 1" in length.
In the picture below, there are 3 solid pine "skids" placed on the bottom of the cabinet to help protect the base. See the 3 red lines below. The 2 pieces that run parallel with the side panel of the cabinet are 30" long and the single front "skid" is 22" long. All of these pieces have measured edges of 1" in length.
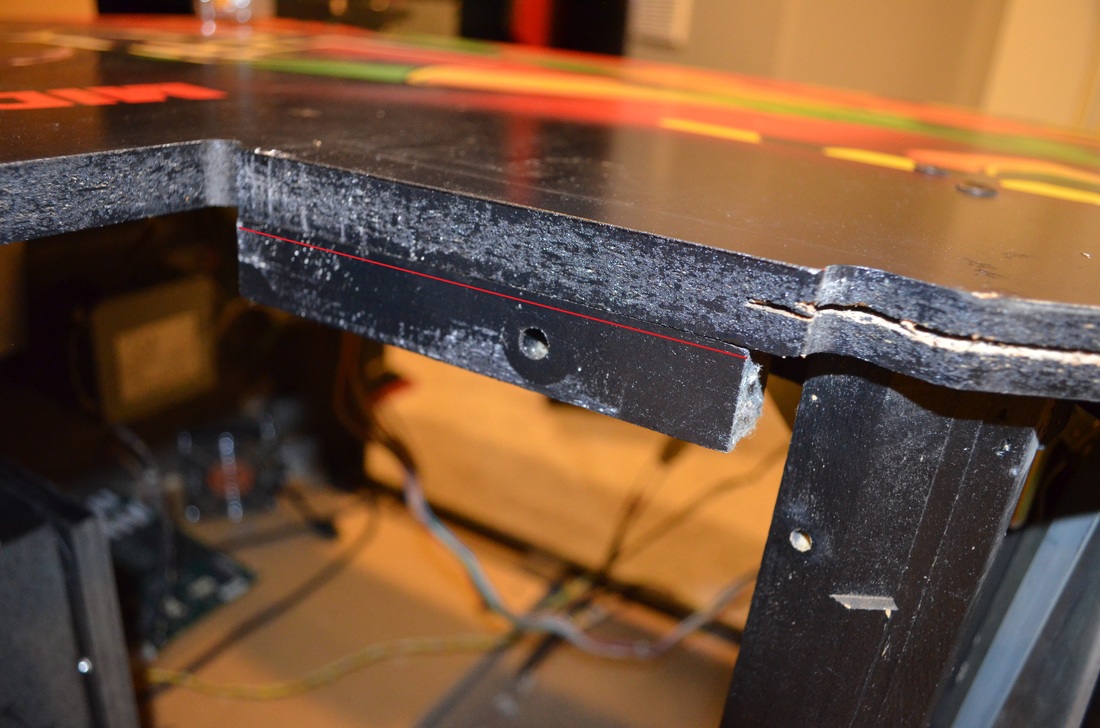
The blocking listed below is also listed on the cabinet CNC/CAD drawings. This is also solid pine with measured edge dimensions of 1" and a length of 6 inches. These pieces are how the control panel bolts to the cabinet.
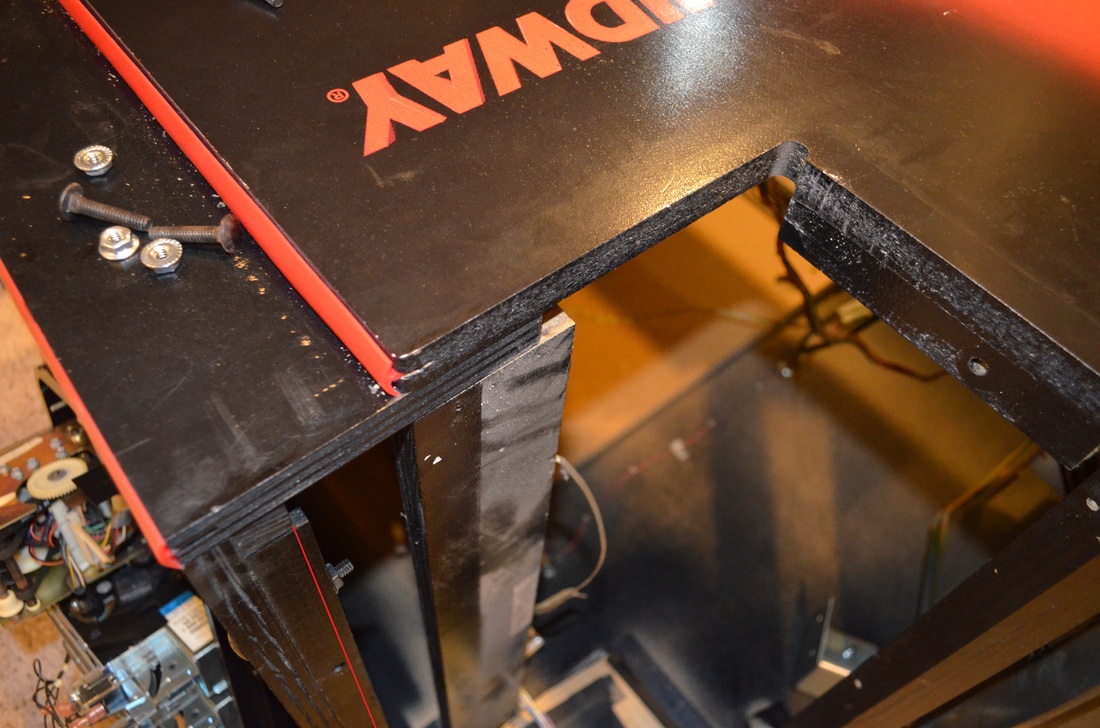
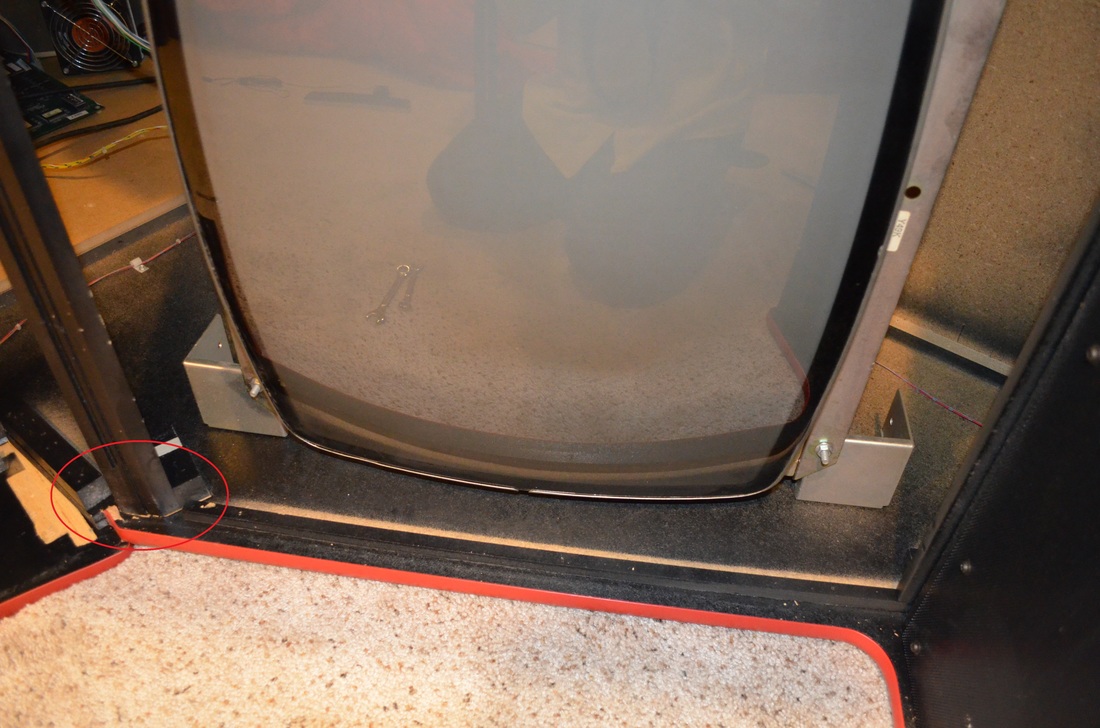
Not the best picture.... but there is a 1" square solid pine support on the back of the front door as well. This piece is how the control panel bolts to the cabinet.
The last addition is the cross brace for the cabinet / monitor shroud / monitor glass. See the profile picture in the CAD drawings for reference. This piece measures 1.5" on edge prior to being cut.
Comments
Please add any comments for the drawing below. Thank you.
11/16/2015 - Initial posting
6/26/2017 - Added printable plans for the control panel.
10/20/2017 -
From KLOVer Superfili
"The plans were very accurate. My brother lost an MKII in the Harvey flooding and I rescued as many parts as I could, including his control panel which I used to replace mine. Side by side they are identical! The only snag i ran into was the little dip on the sides of the cabinet where the control panel rests. I had to trim them down some because the control panel wasn’t going down all the way. And the most difficult part was figuring out the angle on the sides where the monitor goes. Other than those things, everything went fairly smoothly."
Last updated 10/20/2017
|
|
Special thanks to the contribution by: Chris for the Pac-Man cocktail plans
All graphics/images/cabinet designs on this site are copyrighted by the their original owners. ClassicArcadeCabinets.com makes no claim to said such rights and provides the cabinet designs for collectors and hobbyist of the original arcade coin-op machines. Images and graphics are for reference only. Any copyright holder wanting their images or reproductions removed from this site should contact us and we will immediately remove these images.
SITE LAST UPDATED January 16, 2024
|
