Frequently Asked Questions
The following topics are covered.
1. Cabinet accuracy
2. CNC general questions
3. Questions about the drawings
4. Wood selection / Questions
5. Use of Laminates
1. Cabinet accuracy
2. CNC general questions
3. Questions about the drawings
4. Wood selection / Questions
5. Use of Laminates
Cabinet Accuracy
I have had a lot of questions about cabinet accuracy... Hopefully below will help to clear it up.
90-100%
These drawings are complete or nearly complete and have enough detail that all artwork, control panels, monitor glass, etc... fit the cabinets and require no modification. Variations in the internal design and structure may vary. From the outside, these cabinets should be indistinguishable from a brand new factory fresh cabinet. All of these drawings have had cabinets cut from the plans and components are verified to fit without modification.
100% - Drawings made from the manufacturer's original engineering drawings.
98% - Perfect drawings made from an assembled cabinet. These drawings have 100% original blocking and assembly techniques, and are indistinguishable from a manufacturer's original cabinet. These drawings contain all of the drill markings as well.
95% - Drawings made from a donor cabinet. All components match 100%. Internal structure has been modified for easier assembly or cutting. Cabinet has non-standard blocking. Internal structure has been modified. Cabinet drawings may be missing internal components for mounting PCBs or power supplies. These drawings are missing items of high level of detail to include drill holes for speakers, mountings, etc... Overall, these drawings will result in a cabinet that is indistinguishable from the outside of a manufacturer's original cabinet, but internally will not be the same.
90%- Same criteria as the 95%, but may be missing a back door or other component.
80-89%
These drawings are complete or nearly complete and have enough detail that all artwork, control panels, monitor glass, etc... should fit the cabinets and require no modification. Variations in the internal design and structure may vary. From the outside, these cabinets should be indistinguishable from a brand new factory fresh cabinet. No cabinets have been cut from these plans. As a result, internal blocking and components may not line up correctly, individual components may need to be modified to get the cabinets to fit together. Many of these drawing may also be "nearly perfect" without having a cabinet cut from the plans. Once a cabinet has been cut, the score will be bumped into the 90%-100% range. I find in many of my drawings, I may make errors in the placement of central blocking due to me not destroying the cabinet when I take measurements. This usually impacts area around the monitor, bezel, and top speaker in the classic Ms. Pacman style cabinets. These are easily rectified once a cabinet is assembled. Additionally, a cabinet may have been cut from the drawings, but the drawings contain deficiencies in detail or completeness. As a result of this deficiency, a higher score (90-100%) will not be awarded. Examples of deficiencies would be missing blocking or guidelines on panel placement (Is the back panel flush or offset by 1/2", etc...)
88% - Perfect drawings made from an assembled cabinet. These drawings have 100% original blocking and assembly techniques, and are indistinguishable from a manufacturer's original cabinet. These drawings contain all of the drill markings as well. The cabinet drawings just need to have a cabinet cut to be moved to a 98% score.
85% - Drawings made from a donor cabinet. All components should match 100%. Internal structure has been modified for easier assembly or cutting. Cabinet has non-standard blocking. Internal structure has been modified. Cabinet drawings may be missing internal components for mounting PCBs or power supplies. These drawings are missing items of high level of detail to include drill holes for speakers, mountings, etc... Overall, these drawings will result in a cabinet that is indistinguishable from the outside of a manufacturer's original cabinet, but internally will not be the same.
80%- Same criteria as the 95%, but may be missing a component. Drawings may not include blocking and/or spacing of components (how far back is the front panel from the edge?)
70-79%
Cabinets have not been cut from the drawings. These drawings are usually complete of all major components, but may be missing specific details such as blocking placement, drilling, etc... The lack of detail decreases the overall rating. NOTE: These drawings can still be used for creating a 100% accurate manufacturer's cabinet, but are missing specific details.
Additionally, if the drawings are from an unknown source or created by an unknown individual, they receive a lower score until the measurements can be verified.
Significant variation may also be present. Expect that these cabinets will take more "effort" to get assembled and have all components drop in and fit 100% correct.
69% and below
These drawings will traditionally not be posted. Drawings are incomplete or inaccurate. Drawings may only consist of side panels.
CNC General Questions
1. What is CNC?
CNC stands for Computer Numerical Control. It allows a computer to precisely move an item in 3 or more axis, in my case a spindle (router). CNC can also be used in 3D printing applications, plasma cutting, laser cutting and many other applications.
2. With respect to arcade cabinets, is CNC better then cutting an arcade machine by hand?
This is a loaded question. If you have a skilled carpenter who has good tools and a template to work with (arcade side panel from a machine), you should be able to produce a high quality arcade reproduction.
Additionally, if you have a CNC machine that is poorly constructed, out of calibration, an under powered spindle / router, wrong bit selection, and poor plans, you can create a CNC cut cabinet with horrible results.
3. So why not do all of the cabinets by hand?
The main advantage of CNC is speed, repeat-ability, and not needing to store templates of arcade cabinets. If an arcade cabinet is constructed of 3 sheets of plywood, on my high end hobbyist system I can cut a cabinet in an hour to an hour and a half. Each cabinet would be identical to the previous cabinets cut. Additionally, since all of the CNC files are electronic, I do not need to keep a stack of side panels around as templates.
4. How accurate is CNC?
This varies greatly from machine to machine. A lot of factors can impact accuracy of the machine, such as rigidity, deflections, cutters, and speed selections. My machine is rated at +/- .005" and has a repeatability of +/- .002". I feel this may be slightly overstated, but I have done work with .03125" bits and use an overlap of 10% for cutting passes (.0031") with beautiful results. The tracking on the bit was impressive between passes.
Questions about the drawings
1. What is VCarve Pro?
VCarve Pro is a program commonly used by CNC hobbyists and professionals that allows them to do some computer aided drawings and allows for the programming of CNC cutter.
2. What is a DXF file?
DXF files are commonly associated with Autocad, but are a standard that can be opened by many different applications. These files contain "drafting" style drawings that can be manipulated or imported into other applications as well. These files allow detailed measurements to be taken from a computer drawing.
3. How do I view a VCarve Pro file?
VCarve pro file can only be viewed with VCarve Pro or other Vetrics products. You can download a free demo at www.vectric.com.
4. How do I open DXF Files?
Hundreds of applications will open Autocad style DXF files. I would pick a flavor of choice. If you are having a problem findings an application, eDrawings by SolidWorks can open the files and is free to use.
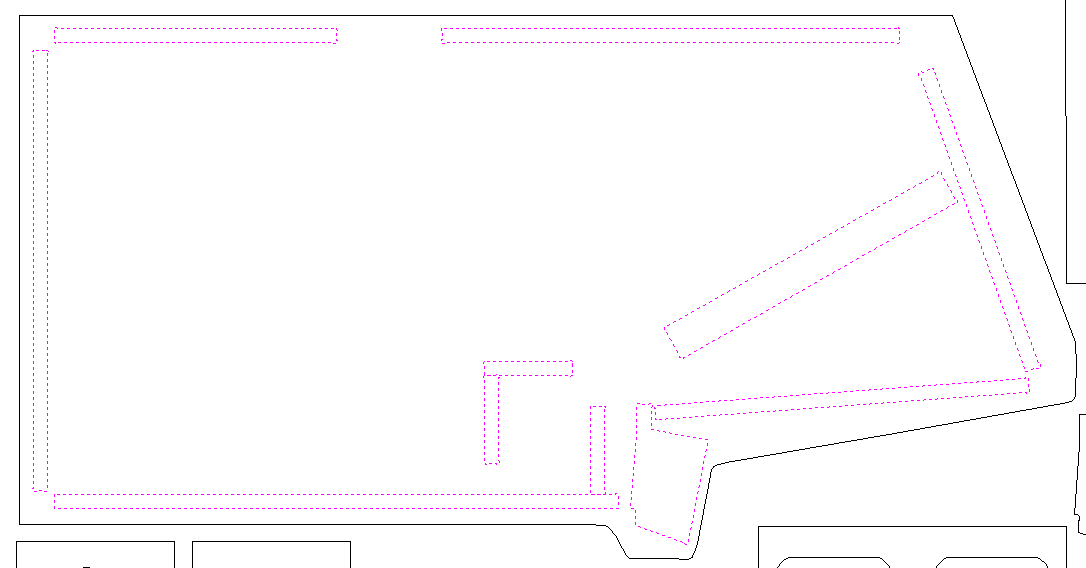
5. What is all this extra "stuff" on the drawings?
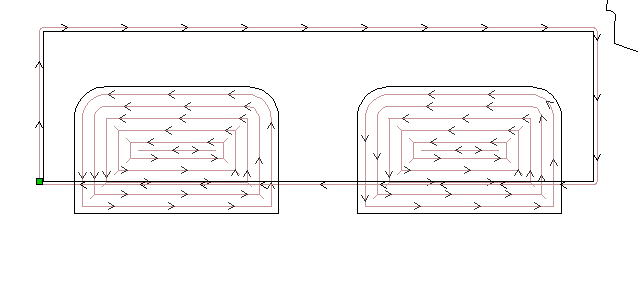
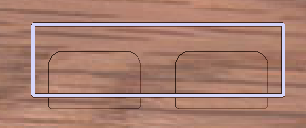
This extra "stuff" is usually in the drawings to assist in the cutting of pockets and special structures within the CNC drawings. Many of these special structures will be spelled out on the drawing specific notes. See below for examples.
|
To help illustrate the extra "stuff" in the drawings, I will be using the top vent and front of the Tempest Cabaret drawings. To start, the drawing looks like what we see to the right. The outer rectangle is the actual top piece, and the two smaller boxes represent the "pocket of material to be removed.
|
6. What is "blocking"?
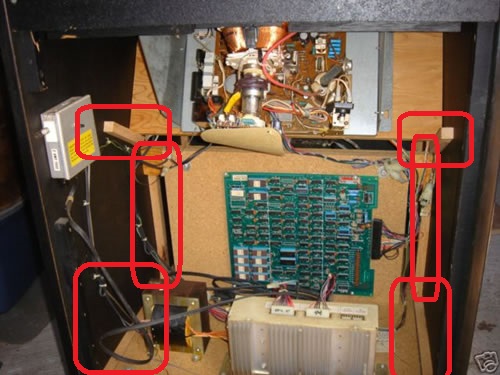
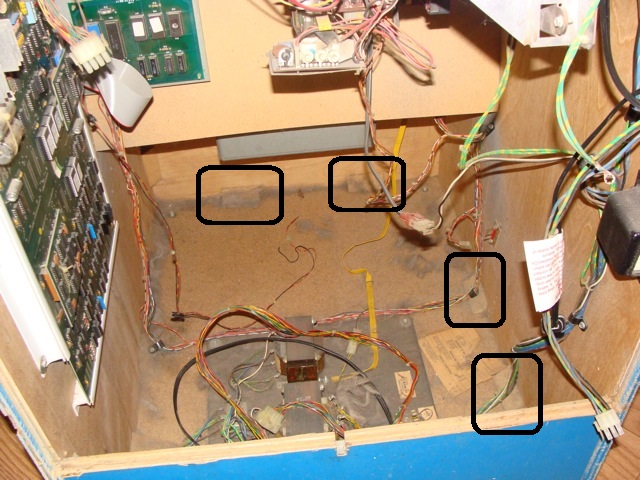
Blocking is the support structure that is used to hold the arcade cabinet together. Blocking varies greatly from one cabinet to another with respect to the style of construction, length, placement, and accuracy.
Blocking is the support structure that is used to hold the arcade cabinet together. Blocking varies greatly from one cabinet to another with respect to the style of construction, length, placement, and accuracy.
7. What is this "dado blocking" talked about?
In the cabinet drawings I create, I traditionally add dados for the blocking. I do this because the dado joints are much stronger then simply surfacing stapling/nailing/gluing a block of wood to the inside of the cabinet as support structure. Additionally, the cuts made for the dados help me place the outer panels for assembly.
Most of the dado joints I cut are only .15" deep. I usually cut the thickness of the dados as the same as the thickness of the material used for fabrication.
8. Doesn't adding the dados make the cabinet less authentic?
Simply put, YES. I feel the additional strength and ease of assembly offset the loss of authenticity of the cabinet being constructed (It is a reproduction anyway). Additionally, these are the same reason I usually only cut a cabinet from furniture grade plywood as opposed to particle board.
Simply put, YES. I feel the additional strength and ease of assembly offset the loss of authenticity of the cabinet being constructed (It is a reproduction anyway). Additionally, these are the same reason I usually only cut a cabinet from furniture grade plywood as opposed to particle board.
|
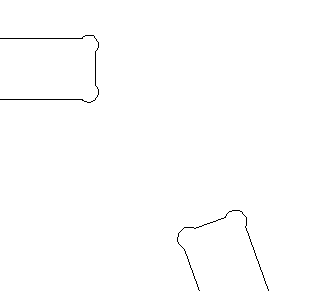
9. Why do all of the corners on the drawings look like dog bones?
This is a CNC thing... What happens is when you are assembling two pieces together and want a tight fit, you need to account for the curvature of the bit you are using to cut your hole or dado. As a result, you can either make the hole or dado a little larger, or you can cut a "dog bone" corner to offset the curvature or the bit. |
Drawing units and scale
I have been asked a few times over the last year about units, scale, and dimensions, and thought I should add it to the faq.
All of the drawings are done in inches. I know I am in the minority in this world by still being stuck on using imperial units (inches), but this is how all my equipment is setup.... so this is what I am using. It should be noted that the DXF files don't care what units you are using, and the old version of the *.DXF files that I am posting does not record the unit of measure. From the drawing's perspective, the drawing is measured in "units".
The fancier CAD programs can convert from one unit to another on the fly, but what most people do is to scale the drawing. Scaling the drawing is he process of increasing or decreasing the size of the drawing by a multiple. This increase or decrease is uniform causing both the X and Y directions of objects to increase or decrease.
To convert the drawing from inches to millimeters, we have to scale the drawing. We use the 1 inch = 25.4mm to do this. The drawing is scaled by a factor of 25.4.
Wood Selection / Questions
|
I just wanted to add a few comments about wood selections. I am defining what the wood types are first and adding my comments at the bottom.
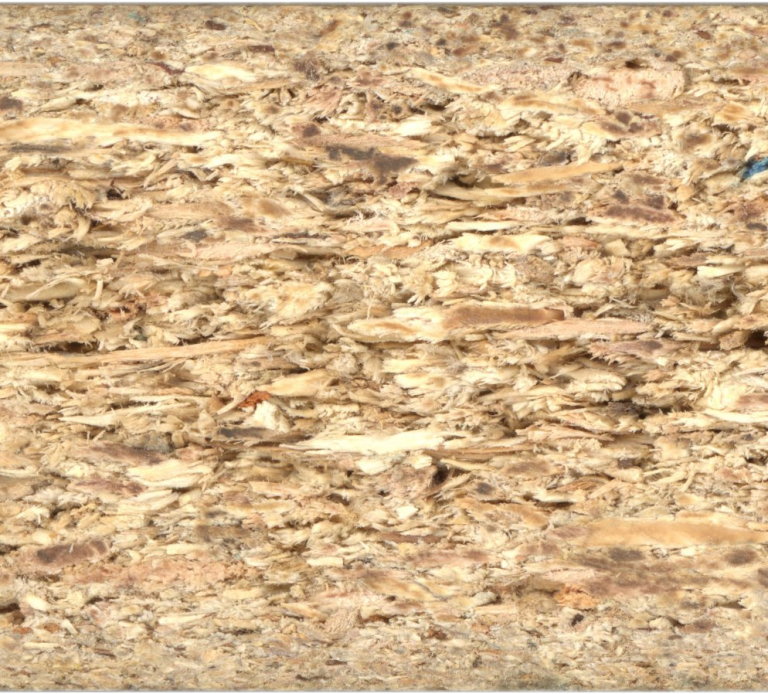
Particle Board - Particleboard is cheaper, denser and more uniform than conventional wood and plywood and is substituted for them when appearance and strength are less important than cost. However, particleboard can be made more attractive by painting or the use of wood veneers onto surfaces that will be visible. Though it is denser than conventional wood, it is the lightest and weakest type of fiberboard, except for insulation board. Medium-density fibreboard and hardboard, also called high-density fiberboard, are stronger and denser than particleboard. Different grades of particleboard have different densities, with higher density connoting greater strength and greater resistance to failure of screw fasteners. A major disadvantage of particleboard is that it is very prone to expansion and discoloration due to moisture, particularly when it is not covered with paint or another sealer. Therefore, it is rarely used outdoors or in places where there are high levels of moisture. (from Wikipedia) |
"Particle board-cross section scan" by MatthiasKabel at the German language Wikipedia. Licensed under CC BY-SA 3.0 via Wikimedia Commons - http://commons.wikimedia.org/wiki/File:Particle_board-cross_section_scan.jpg#/media/File:Particle_board-cross_section_scan.jpg
|
|
Melamine - "This is the most common material for making modern cabinets. Melamine is a particleboard material that is then coated with a thin plastic layer (usually both sides). Melamine is usually is available in white and can be special ordered in black at most hardware stores. Pros and Cons are listed below. Melamine resin is often used to saturate decorative paper that is laminated under heat and pressure and then pasted onto particle board; the resulting panel is often called melamine and commonly used in ready-to-assemble furniture and kitchen cabinets." (from Wikipedia) Pros a. Extremely flat and even in thickness. b. Even construction with uniformity throughout the product. c. Easy to cut / route. d. Inexpensive compared to some other products. e. No need to finish, already has a plastic white or black layer on it. Cons a. This is not a very structurally sound product for arcade machines. If there is a "collision" with another machine, the weak wood break / chips /etc.... b. Difficult to repair and re-finish. Usually involving significant amounts of Bondo. c. The use of fasteners is more difficult. Screws don't always bite into the material as well as other products. Pneumatically fed nails and staples can cause the material to chip / crack / notch out/ blow out around the edges. Once this occurs, it can be difficult to repair. d. Material reacts badly to water. The plastic surface may bubble if exposed to moisture / humidity, and the wood will swell if exposed to too much water. e. Material becomes more brittle over time / moisture exposure. |
|
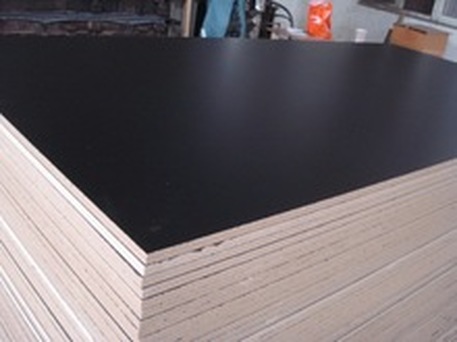
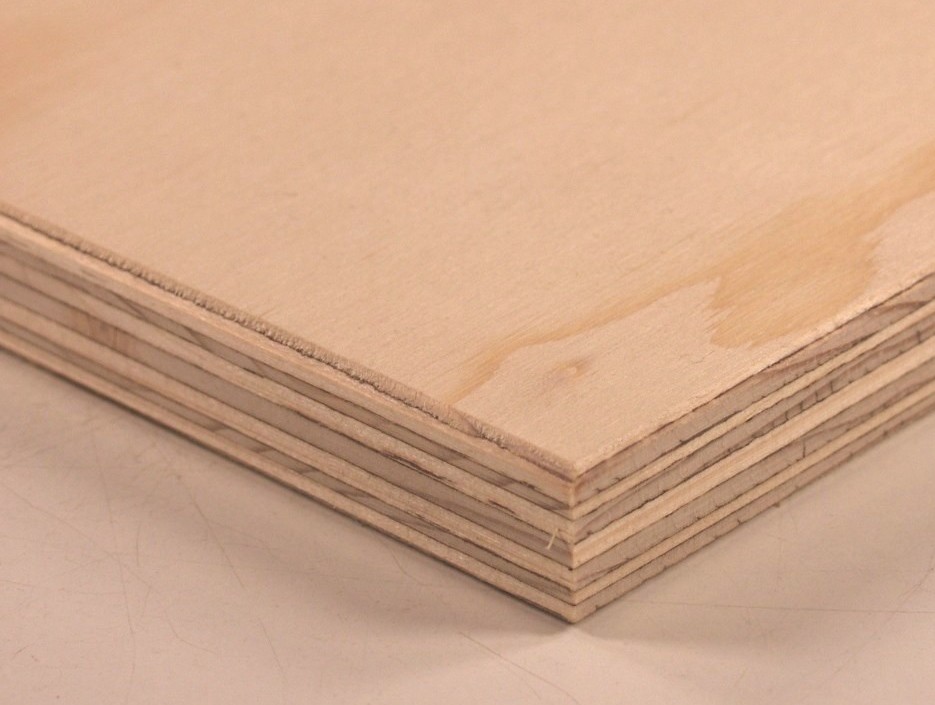
Furniture Grade Plywood - The second most common cabinet material. "Plywood is a sheet material manufactured from thin layers or "plies" of wood veneer that are glued together with adjacent layers having their wood grain rotated up to 90 degrees to one another. It is an engineered wood from the family of manufactured boards which includes medium-density fibreboard (MDF) and particle board (chipboard). All plywoods bind resin and wood fiber sheets (cellulose cells are long, strong and thin) to form a composite material. This alternation of the grain is called cross-graining and has several important benefits: it reduces the tendency of wood to split when nailed at the edges; it reduces expansion and shrinkage, providing improved dimensional stability; and it makes the strength of the panel consistent across all directions. There are usually an odd number of plies, so that the sheet is balanced—this reduces warping. Because plywood is bonded with grains running against one another and with an odd number of composite parts, it is very hard to bend it perpendicular to the grain direction of the surface ply." (from Wikipedia) Pros a. Much stronger then other composite materials b. Better resistance to water / moisture c. Easier to repair and repaint if damage occurs d. Stronger over time Cons a. Greater cost b. Depending on source /cost of materials, variations in thickness, number of layers, and voids (gaps in the layers) can be present. c. Requires greater skill to work with. d. Not the same material as the majority of cabinets out there. |
"Spruce plywood" by Bystander - Own work. Licensed under CC BY-SA 3.0 via Wikimedia Commons - http://commons.wikimedia.org/wiki/File:Spruce_plywood.JPG#/media/File:Spruce_plywood.JPG
|
|
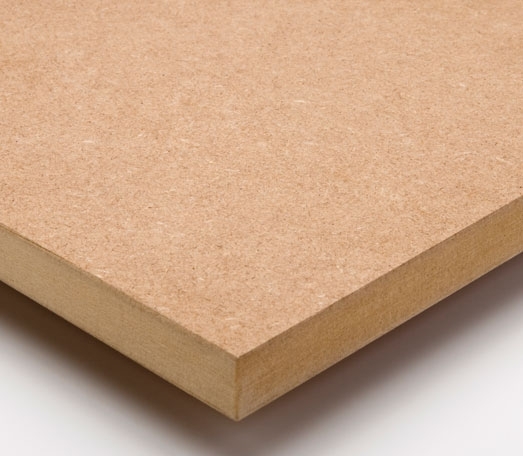
Medium Density Fiberboard (MDF) - is an engineered wood product made by breaking down hardwood or softwood residuals into wood fibres, often in a defibrator, combining it with wax and a resin binder, and forming panels by applying high temperature and pressure.[1] MDF is generally denser than plywood. It is made up of separated fibres, but can be used as a building material similar in application to plywood. It is stronger and much denser than particle board. (https://en.wikipedia.org/wiki/Medium-density_fibreboard)
Pros a. Extremely flat. b. Extremely even construction. c. Cuts easily. Cons a. Absorbs water like a sponge... and expands. For this reason it is a horrible selection for arcade cabinets. b. Extremely messy when cutting. c. Extremely heavy. d. Edges dent easily. |
|
Medium Density Overlay (MDO)
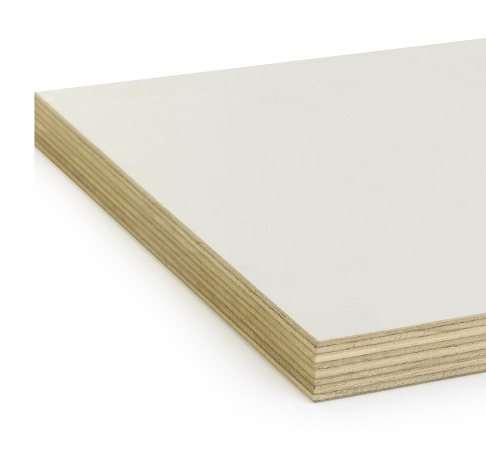
This is a new material for me in the last few months, and has evolved into one of my favorites. The material is a standard exterior grade plywood. My most recent purchase batch has a higher ply count then that of the big box stores, but not to the level of the Baltic Birch. It then has a thin layer of MDF on the outside coating the plywood. It has all of the advantages of strength weight, and cutting of standard plywood, but has a perfectly smooth surface for painting, similar to the MDF. My local supplier has been getting me the material pre-primed. Pros a. Extremely Flat b. Cuts easily c. Perfectly smooth and paint ready d. Available pre-primed Cons a. COST (Pre-primed is about $100 a sheet) |
Wood selection comments
NOTE:
After working with cabinets for a while, some of my opinions continue to change. My previous comments are below in italics.
The more you work with materials, the more you start to see the pros and cons of all of the materials. The melamine comes "pre-finished" and requires very little follow-up work. The Plywood and laminate produces very nice "finished color cabinets" but has a limited color palette.
Currently, my "new" favorite material is MDO (see above). The material is commonly used for sign makers. The material has a plywood core and a MDF layer on the outside, similar to a veneer. It is strong, light (compared to MDF), perfectly flat and smooth, and paints very well. It can also be ordered per-primed as well.
While MDO does not get you out of the business of having to paint, it requires little prep to get to a final coat. Additionally, the material is easily repaired with traditional methods, unlike the melamine (when it chips or dings).
A note on laminates. I am still a huge fan of laminates if you can find the correct color. With that said, I now prefer to use standard counter top grade laminate on the outsides of the cabinet, and to paint the insides of the cabinet (prior to cutting or assembly). The vertical grade laminate is difficult to work with an cracks very easily (especially on the cold). I have found that I prefer to paint. For paint I use Kiltz Oil Based Primer and apply it moderately thick with a roller. Once fully dry, I sand the primer. I then spray with thinned Rustoleum Satin using HVLP. Sand and repeat until you reach your desired level of professionalism. I really love the automotive finishes, but the Rustoleum is much more cost effective when painting a pile of cabinets. If price isn't a problem, go with automotive paints.
My primary material for cutting cabinet is now black melamine. This is still not my favorite material to work with (I prefer furniture grade plywood), but having a black cabinet pre-finished saves a pile of time in painting and wood preparation. The main advantage is cost (black melamine is in the <$40 range a sheet, while furniture grade plywood can exceed $100 a sheet). Additionally, there are cost saving in priming and painting, not to mention hours of time saved in wood preparation and finishing. If I am building a "keeper" for myself, I may still use furniture grade plywood, but overall, black melamine is a viable option in most cases.
Below are a couple of notes for working with black melamine.
a. Routing - since black melamine chips so easily when cutting, it is important that you use a good and sharp bit when cutting. Personally I use Whiteside 2102, a 1/4" compression bit. I usually get about 4 sheets cut before the cutter causes the melamine to chip (Note: the bit is still good enough to cut plywood). My cutting feeds and speeds are at 180 in/min with a cut depth of .40" per path when cutting 3/4" melamine.
b. T-Molding - cut and install the T-Molding as soon as possible. The melamine is extremely strong for direct impact, but the edges are sensitive to damage and chipping. As soon as I cut out a side panel, I install the T-molding to protect the panel. Trust me on this. I have dented too many panels moving them around the workshop. T-molding is always installed first.
c. If you have to cut anything with a table saw, you have to take precautions to minimize chipping. A fine toothed blade helps if you have one available. Use painters tape to protect the cut. Finally, you want to have the blade cut as perpendicularly as possible to the surface. I usually have my blade in as high a cutting position as possible.
d. Assembly needs to use melamine glue and or screws (you could use pneumatic staples, but I prefer not to due to shipping). I personally use Roo Industries R1Gl4 Eco Melamine Adhesive. Great stuff. Once it dries, it is much stronger then the melamine. I also use Kregg screws to assist in assembly... in most cases to hold the cabinet together while the glue dries. In most cases, the Kregg screws are strong enough to assemble the cabinet, but the Roo glue makes the joints rock solid.
I still love to cut in plywood.... so most of the below still applies.
1. Unless requested otherwise, I cut all of my cabinets out of furniture grade plywood. I know cost are a little higher, but why spend all the money, time , and effort building a cabinet to save $30 by selecting Melamine that will damage the edges once you move the cabinet for the first time.
2. Use good quality plywood. If you can find it, Baltic Birch usually is usually of higher quality and contains more plys (layers) then what you find in your typical big box store. Better plywood is of more uniform in thickness, contains less voids, and is easier to work with. Marine grade is also usually nice stuff, but is very expensive and can be difficult to find.
3. For a wood grain cabinet, consider using real wood. Results can turn out quite beautiful by staining a cabinet of oak plywood. This also may be significantly cheaper then using a wood grain vinyl.
4. Instead of using black melamine, consider using a piece of furniture grade plywood and use vertical grade laminate in black on both sides. It comes out beautiful, in minimally thicker then the original material, and is extremely durable.
Use of Laminates
The use of laminates are a great alternative to using vinyl...especially if you are cutting your cabinet with a CNC. Laminates are not much more expensive than vinyl, are extremely tough, long lasting, and you have a perfectly smooth finish when you are done. It is not uncommon to spend hours filling, priming and sanding to try and get your cabinet glass smooth prior to applying the vinyl....only to see every tiny defect when your are done. Additionally, the first time you bump the side of the cabinet, you break down and cry after seeing the damage. Laminates cover everything, so as long as the wood is marginally smooth, your prep work is done.
The greatest advantage to the laminate is that you can apply it to your wood prior to cutting (with a CNC). As a result you get pieces that look like they were CNC cut with Malamine on both sides. It is also a huge time saver if you are going to use wood grain materials. You can apply color laminates and once the machine is cut and assembled, you are done. No need to spend a week priming, sanding, and painting.
Vertical Grade laminates are the thinnest and the best use for arcade cabinets....especially if you are OCD and have concerns about the T-Molding covering everything. Vertical grade laminate cracks / tears / breaks very easily during installation...so make sure you have help when installing.
On the few cabinets I have cut for myself, I have used conventional thickness laminate and installed it myself with beautiful results. I still prefer this method if I am only applying laminate on one side.
Last updated 7/5/2017
|
|
Special thanks to the contribution by: Chris for the Pac-Man cocktail plans
All graphics/images/cabinet designs on this site are copyrighted by the their original owners. ClassicArcadeCabinets.com makes no claim to said such rights and provides the cabinet designs for collectors and hobbyist of the original arcade coin-op machines. Images and graphics are for reference only. Any copyright holder wanting their images or reproductions removed from this site should contact us and we will immediately remove these images.
SITE LAST UPDATED January 16, 2024
|

